Delicious Recipe For Milk Chocolate Sand Roses: A Sweet Treat You'll Love
Are you ready to dive into the world of delightful French pastries? Recette rose des sable chocolat au lait is about to become your new baking obsession. These adorable milk chocolate sand roses are not only stunning but also incredibly tasty. Perfect for any occasion, these treats will impress your friends and family with their elegant appearance and rich chocolate flavor. So, let's get started and explore the magic of creating these delightful roses in your kitchen.
This recipe has been a favorite among pastry enthusiasts for years. The combination of buttery shortbread and smooth milk chocolate creates a taste sensation that's hard to resist. Whether you're a beginner baker or an experienced pastry chef, this recipe offers something for everyone. Plus, the visual appeal of these roses makes them a showstopper at any gathering.
Before we jump into the recipe, let me tell you why these milk chocolate sand roses are so special. They're not just about the taste; it's also about the joy of creating something beautiful with your own hands. Each rose is a small masterpiece, and the process of making them is almost as rewarding as eating them. So, grab your apron, and let's get baking!
What You Need to Know About Milk Chocolate Sand Roses
Key Ingredients for Success
Every great recipe starts with quality ingredients, and these sand roses are no exception. You'll need butter, sugar, flour, milk chocolate, and a few other essentials. The key to making these roses truly shine is using high-quality chocolate. Look for a brand that offers rich flavor and smooth texture. Also, don't skimp on the butter; it's what gives the shortbread its melt-in-your-mouth quality.
- Butter: Use unsalted butter for better control over the flavor.
- Sugar: Granulated sugar works best for this recipe.
- Flour: All-purpose flour is perfect for creating the right texture.
- Milk Chocolate: Choose a brand you trust for the best results.
Tools You'll Need
Having the right tools can make all the difference in your baking experience. For this recipe, you'll need a few basic items that you probably already have in your kitchen. A good rolling pin, a sharp knife, and a silicone mat will help you achieve the perfect shape and size for your roses. Don't forget a piping bag if you want to get fancy with your chocolate decorations.
Step-by-Step Guide to Making Milk Chocolate Sand Roses
Now that you have all your ingredients and tools ready, it's time to dive into the actual process. Follow these simple steps, and you'll be enjoying your homemade milk chocolate sand roses in no time.
Preparing the Dough
The first step is preparing the dough. This is where you'll mix your butter, sugar, and flour to create a soft, pliable mixture. Make sure to cream the butter and sugar together until light and fluffy. Then, gradually add the flour until the dough comes together. Wrap it in plastic wrap and let it rest in the fridge for about an hour. This resting period is crucial for achieving the right texture.
Creating the Rose Shapes
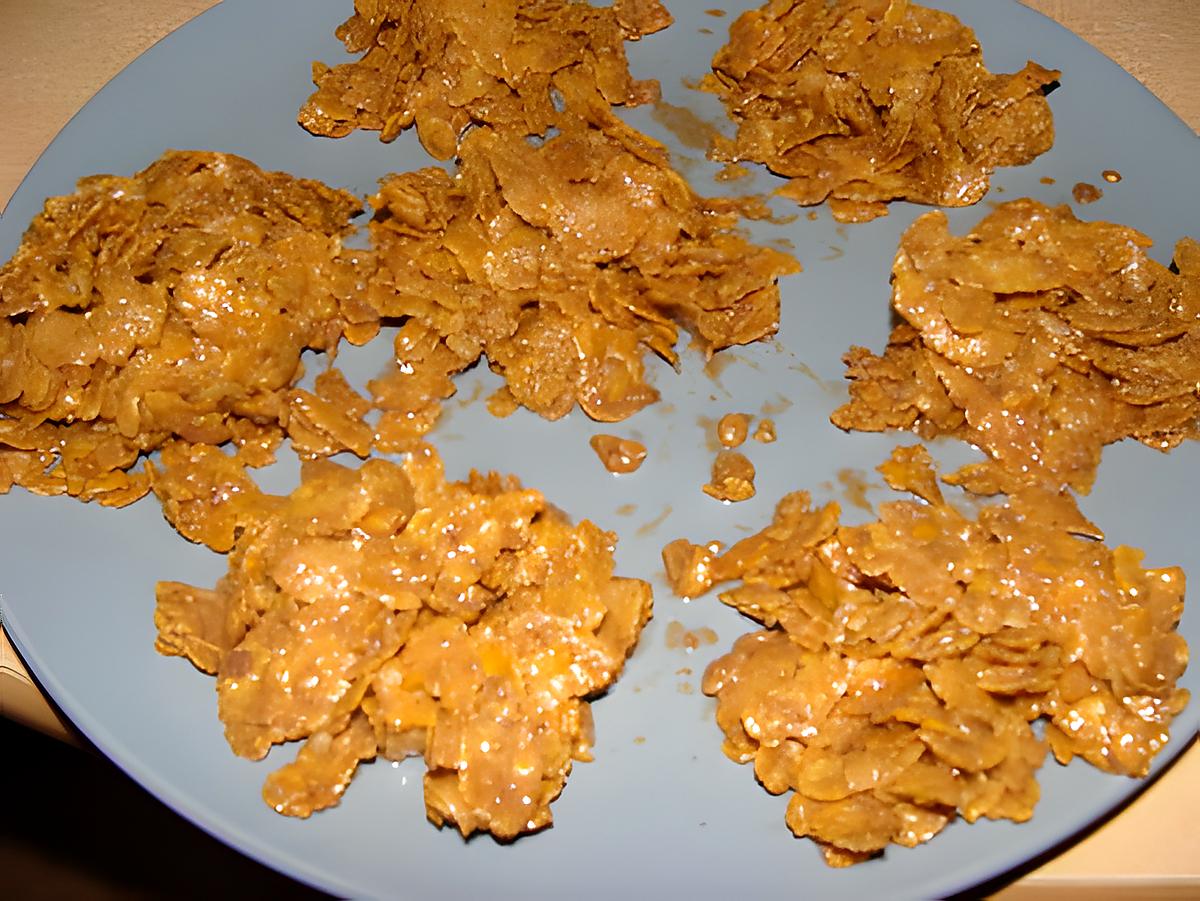
Once your dough is ready, it's time to shape it into roses. Roll out the dough to about 1/8 inch thickness and use a circular cookie cutter to create the petals. Start with a small circle for the center and gradually add larger circles to build the rose. Gently roll each circle into a petal shape and layer them on top of each other to form the rose. This part can be a bit tricky, but with a little practice, you'll get the hang of it.
Baking the Roses
Bake your roses in a preheated oven at 350°F (175°C) for about 10-12 minutes. Keep an eye on them to ensure they don't over-bake. You want them to be golden brown around the edges but still soft in the center. Once they're done, let them cool on a wire rack before moving on to the next step.
Adding the Milk Chocolate Touch
Melting the Chocolate
While your roses are cooling, it's time to melt the milk chocolate. You can do this in a double boiler or in the microwave. If using the microwave, heat the chocolate in short bursts, stirring between each one to ensure even melting. Once melted, let it cool slightly before using it to decorate your roses.
Decorating the Roses
Now comes the fun part – decorating your roses with the melted chocolate. You can drizzle it over the top, use a piping bag to create intricate designs, or simply dip the bottom of each rose for a more subtle look. The choice is yours, and the possibilities are endless. Get creative and make these roses your own.
Tips and Tricks for Perfect Sand Roses
Here are a few tips to help you achieve the best results with your milk chocolate sand roses:
- Make sure your butter is at room temperature before starting.
- Don't overwork the dough; handle it gently to keep it soft.
- Use parchment paper when baking to prevent sticking.
- Experiment with different chocolate brands to find your favorite.
Common Mistakes to Avoid
Even the best bakers make mistakes sometimes. Here are a few common pitfalls to watch out for:
- Over-baking the roses, which can make them too crispy.
- Using low-quality chocolate, which can affect the taste.
- Not letting the dough rest, which can result in tough roses.
Health Benefits of Milk Chocolate
Believe it or not, milk chocolate can offer some health benefits when consumed in moderation. It contains antioxidants, calcium, and magnesium, all of which are good for your body. Plus, the joy of eating something delicious can boost your mood and reduce stress. So, go ahead and indulge – just remember to balance it with a healthy diet and exercise.
Where to Find Inspiration
If you're looking for more ideas and inspiration, there are plenty of resources available. Check out baking blogs, YouTube channels, and social media platforms for tutorials and tips from other pastry enthusiasts. You might even discover new variations of the milk chocolate sand rose recipe that you'd like to try.
Conclusion: Start Baking Today!
There you have it – everything you need to know to create delicious milk chocolate sand roses in your own kitchen. This recipe is not only a fun project but also a great way to share your love of baking with others. Remember to experiment and have fun with the process. And don't forget to take plenty of pictures; these roses are too beautiful not to share!
So, what are you waiting for? Grab your ingredients, roll up your sleeves, and let's get baking. Once you've tried this recipe, be sure to come back and share your experience in the comments. We'd love to hear how your milk chocolate sand roses turned out. Happy baking!
Table of Contents
- What You Need to Know About Milk Chocolate Sand Roses
- Key Ingredients for Success
- Tools You'll Need
- Step-by-Step Guide to Making Milk Chocolate Sand Roses
- Preparing the Dough
- Creating the Rose Shapes
- Baking the Roses
- Adding the Milk Chocolate Touch
- Melting the Chocolate
- Decorating the Roses
- Tips and Tricks for Perfect Sand Roses
- Common Mistakes to Avoid
- Health Benefits of Milk Chocolate
- Where to Find Inspiration
- Conclusion: Start Baking Today!
Recette de Roses des sables au chocolat au lait
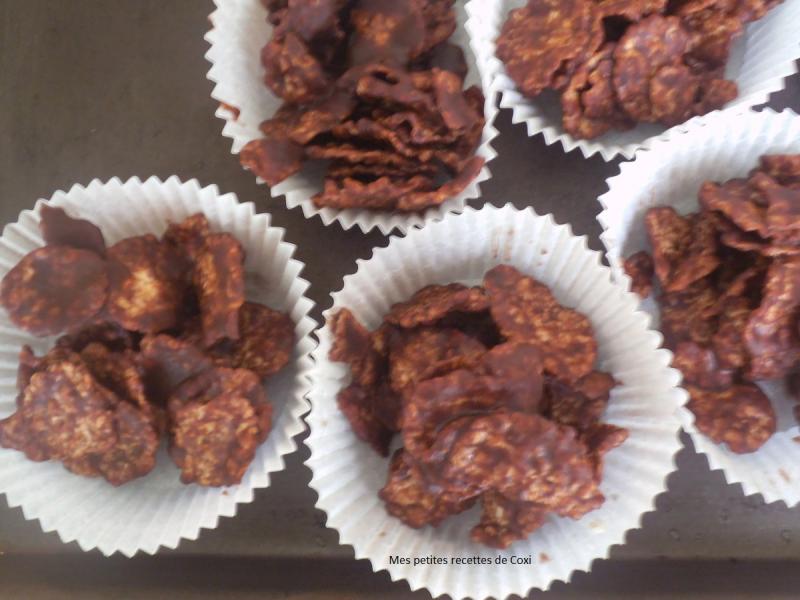
Rose des sable au chocolat au lait Mes petites recettes de coxi
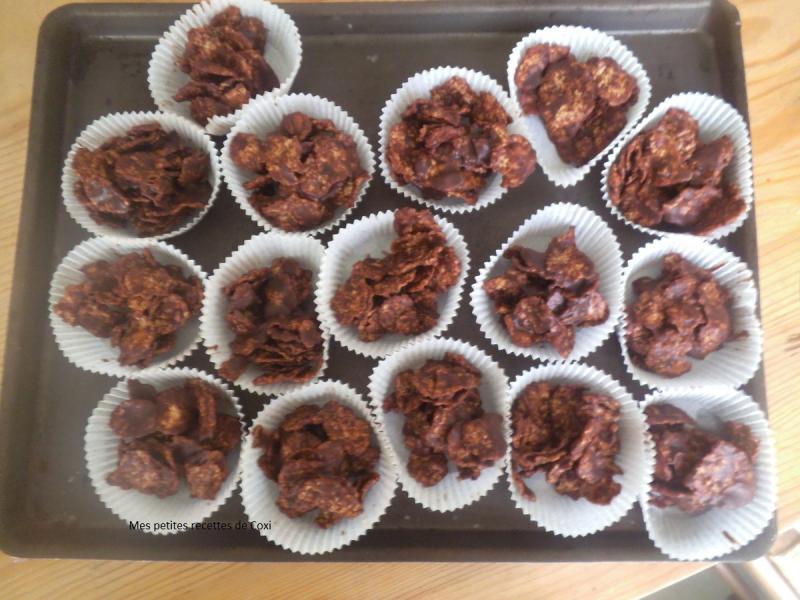
Rose des sable au chocolat au lait Mes petites recettes de coxi
